With two daughters, one who was born with a full head of hair and the other who idolizes Rapunzel, I figured I should learn how to make hair bows. Caroline's hair has always been difficult to manage. At one point she had a chunk of hair that always stuck up in the back... for several months. I called it her "peacock feather." I would slick it down and it would pop right back up. Talk about a bad hair day! As she has gotten older and her hair has grown longer, it has become even more unkempt. I couldn't find hair bows or barrettes that would keep her hair back, so I decided to take matters into my own hands.
 |
| The "peacock feather" in full effect. |
I began by making barrettes embellished with felt flowers. Soon after, I started making headbands and hair bows. Today I’ll show you how I make hair bows. There are various methods, but this is what I have found works best for me. It takes a little practice, but once you get the process down, it’s really quite easy. Soon, you’ll be hooked and you’ll want to make a hair bow in every color of the rainbow. Visit www.lizzieandcoco.etsy.com to see some of my hair accessory designs.
Here's what you will need:
- One piece of 1.5" ribbon cut 24" long
- One piece of 3/8" ribbon cut 2" long. Here it is fun to use a ribbon that is similar in color but includes polka dots, ticking stripe, etc.
- Thread in coordinating color
- Needle (Thread the needle and knot it before you begin the project).
- Scissors
- Lighter
- Hot glue gun
- Barrette of your choice (not pictured here). I like to use medium-sized french barrette clasps as they keep Caroline's hair in place all day. I have also used alligator clips for bows I have made for babies and children with less hair. You can also attach the bow to a headband wrapped in grosgrain.
 |
| Supplies |
Step 1: Fold the long piece of ribbon in half. Cut off the very ends of the ribbon diagonally. Using the lighter, quickly run the flame along the cut edges of the ribbon. This will melt the edges and keep the ribbon from fraying.
 |
| Step 1 |
Step 2: Loop the top portion of the ribbon around and on top of itself. The pointy part of the ribbon's diagonal cut edge should point toward you not away from you.
 |
| Step 2 |
Step 3: Loop the loose end of the ribbon back up on top of itself and away from you. You now have formed the top two loops of the bow.
 |
| Step 3 |
Step 4: Loop the loose end underneath the other loops forming the third loop of the bow. The loose end should now be pointing toward you.
 |
| Step 4 |
Step 5: Loop the loose end over top of the other loops forming the fourth and final loop of the bow.
 |
| Step 5 |
Step 6: Flip the bow over, careful not to let go of it. Look at each loop to ensure they are equal in size. Adjust accordingly. Now working with both hands, you will fold the center part of the bow four times. Use your right hand to fold and your left hand to gather and hold the bow. Hold it tight!
 |
| Step 6 |
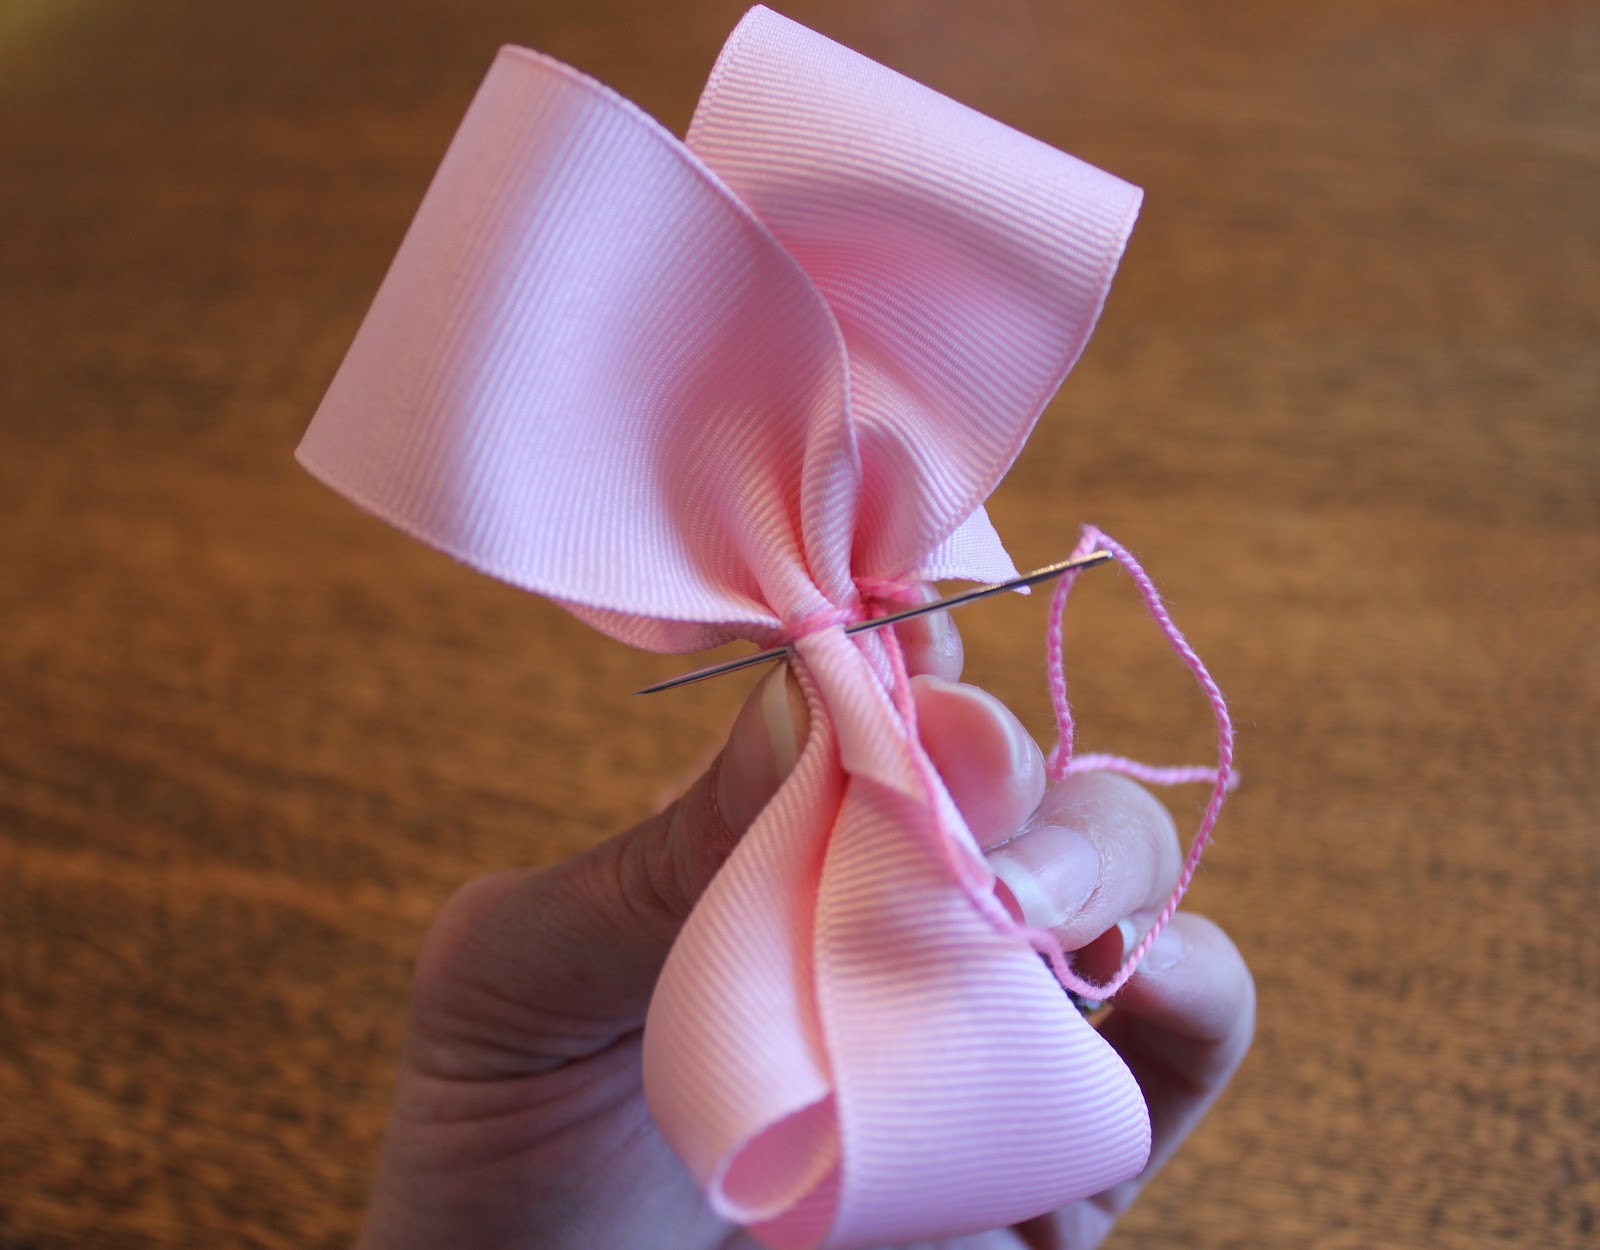
Step 7: Holding the bow with your left hand, grab your threaded needle and push it through the center of the bow, pulling the thread through completely. Then, wrap the thread around the center of the bow two or three times. Then, push the needle back through the center of the bow, knot it and cut off the excess thread. You now have a bow!
 |
| Step 7 |
 |
| This is how your bow will look after step 7. |
Step 8: To finish the bow off, next you'll want to use the lighter on the edges of the small piece of ribbon to also keep those from fraying. Place a small bead of glue from your hot glue gun on the center of the back side of your bow. Press down lightly for a minute until the glue is dry. Then wrap the 3/8" ribbon around the front side of the bow. Finally place another bead of glue on the back side of the bow again and press down on the loose end of the ribbon.
 |
| Step 8 |
Step 9: You're almost done! Now, you just need to glue your barrette to the back. Place a strip of hot glue along the back side of the barrette of your choice. Before you do so, make sure to figure out which way you want the barrette to close based on how you would put it in your little one's hair. Quickly (hot glue dries pretty fast) press the bow onto the center of the back of the bow.
 |
| Step 9 |
That's it! It will take a little practice getting each loop the right size, but I promise it will become easier the more you do it. I hope you enjoy making hair bows for your little ones as much as I do. Stay tuned for more craft tutorials!


No comments:
Post a Comment